• Skip to primary navigation
  • Skip to content
  • Skip to primary sidebar

Life on Beacon

  • Food
  • Flight
    • Travel Guides
      • Africa
      • Europe
      • Texas
      • United States
    • Travel Tips
  • Fitness
    • Fit Pregnancy
    • DIY Competition Bikini
  • Family
  • At Home
    • DIY
    • Look for Less
  • About

How We Saved Hundreds on Our Island Pendants

May 3, 2023

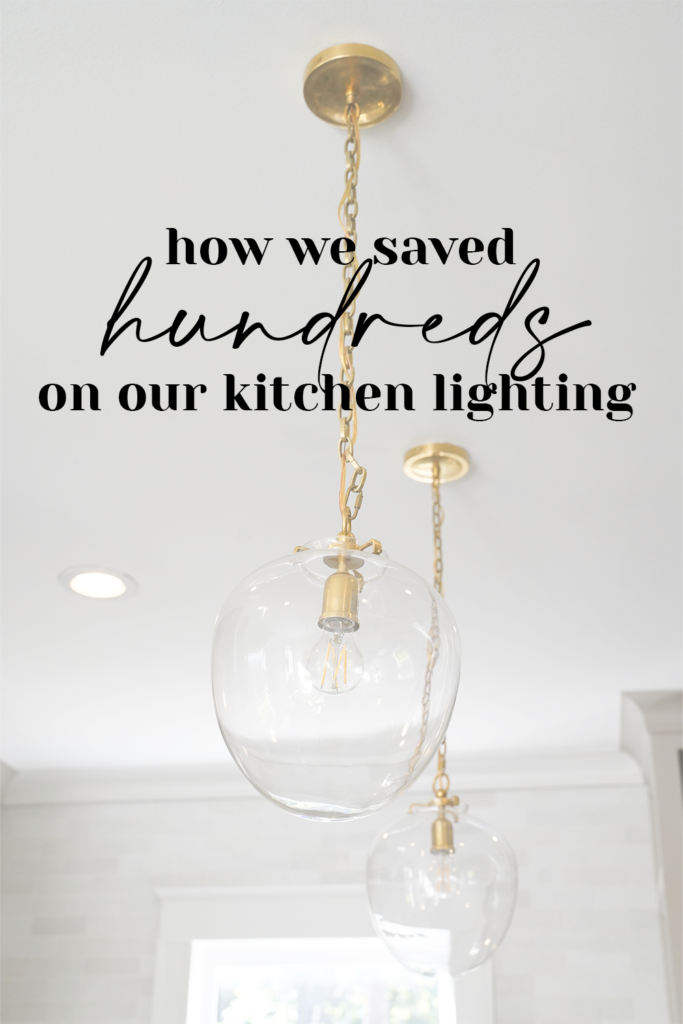
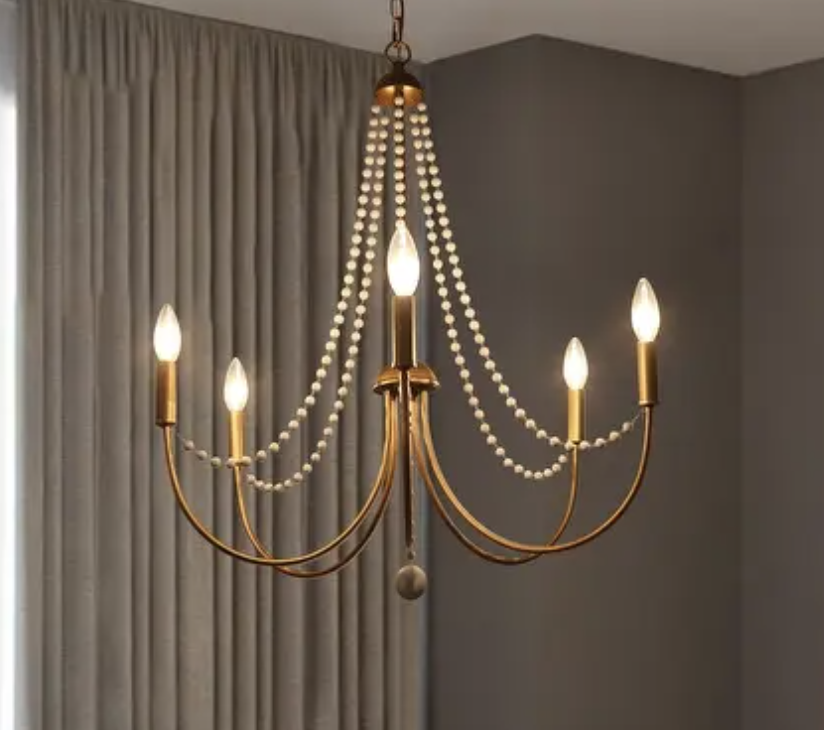
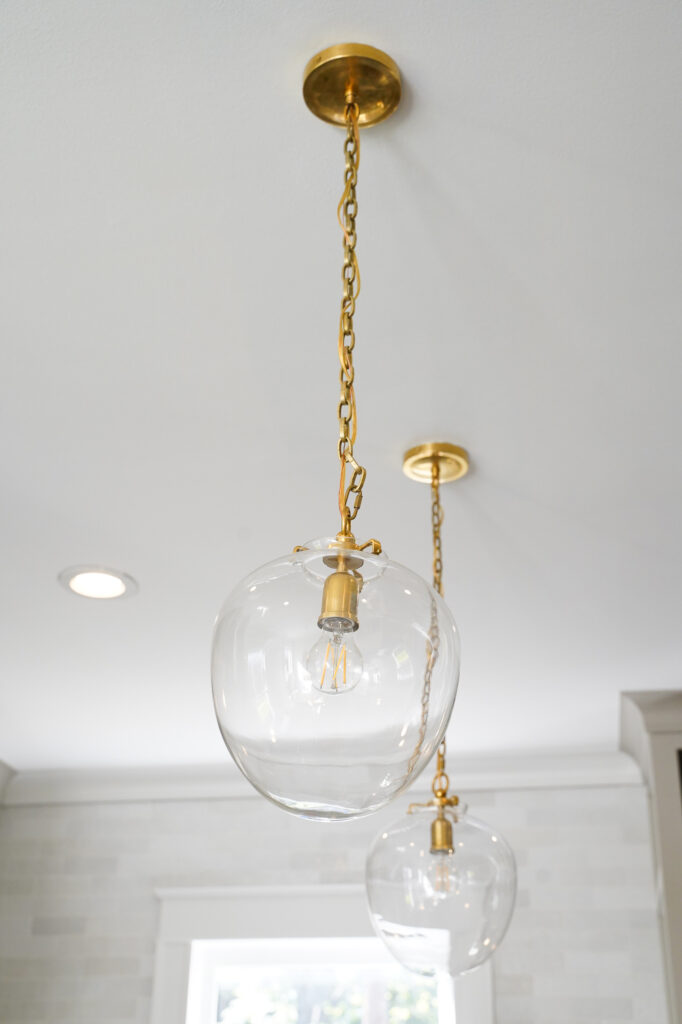
There are SO many options out there for kitchen pendants. As we were redoing our historic kitchen, we knew we wanted something classic yet refined and simple. The range wall was designed to be a feature piece, and we didn’t want the island pendants to distract from that.

Visual Comfort has been my go-to brand for classic, well made, gorgeous lights (they’re also a favorite of Studio McGee, Jean Stoffer, and Whittney Parkinson, some of my design inspirations). They carry a pretty big price tag, though. Pendants in their Thomas O’Brien collection – my personal favorite – start around $400. We need two for our kitchen. I was struggling to figure out how $1,000 in lighting made sense.

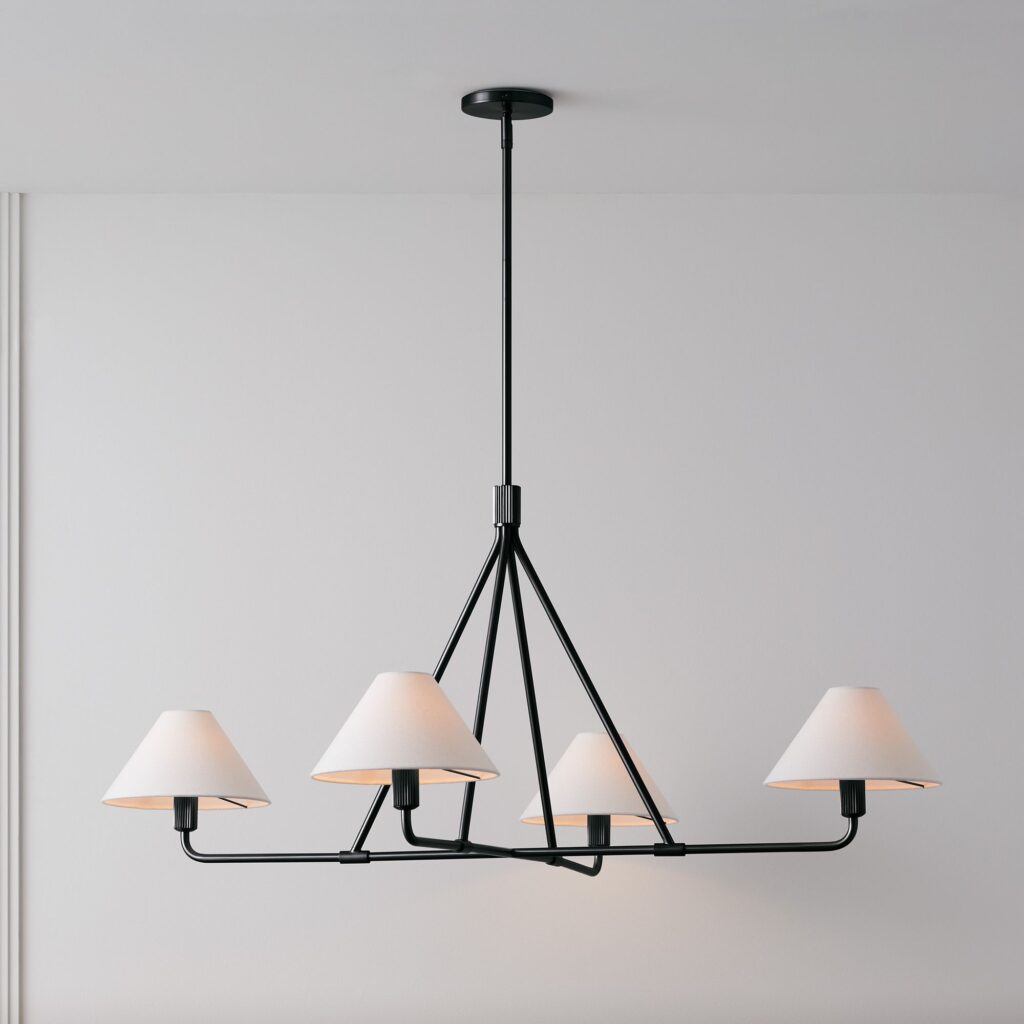
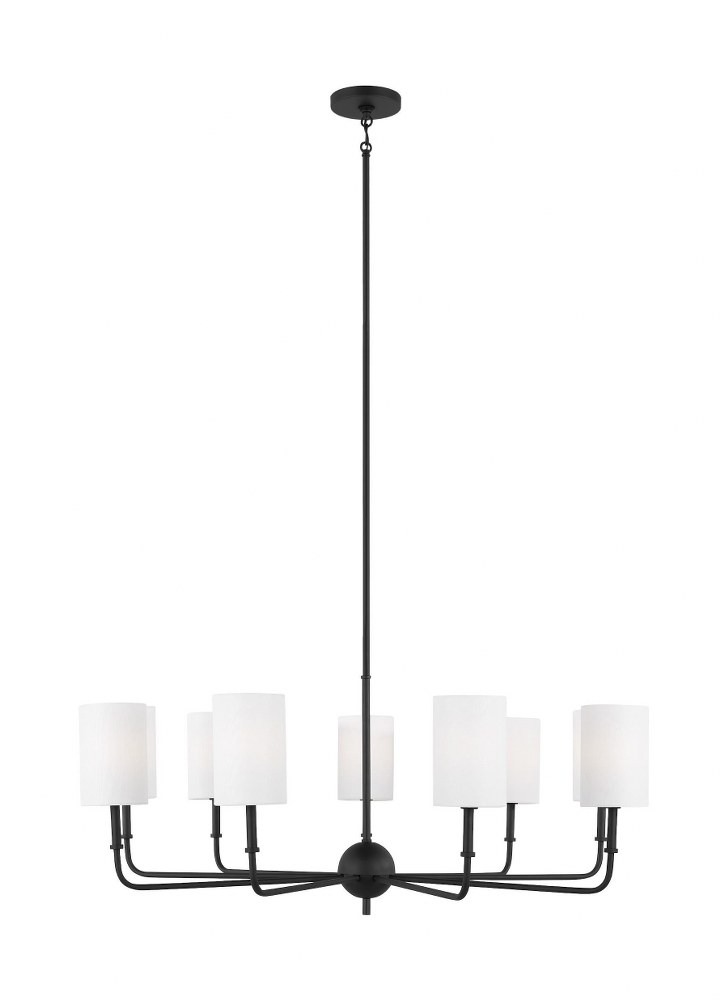
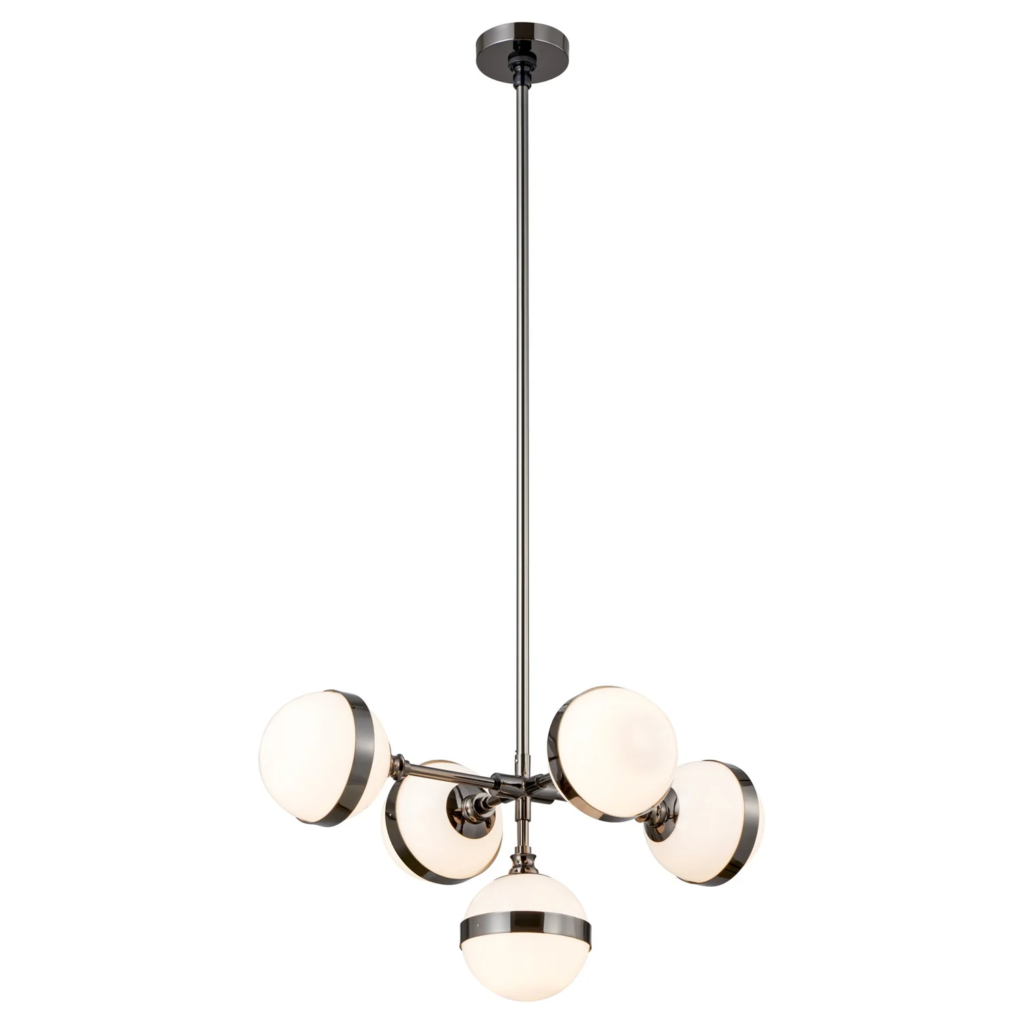
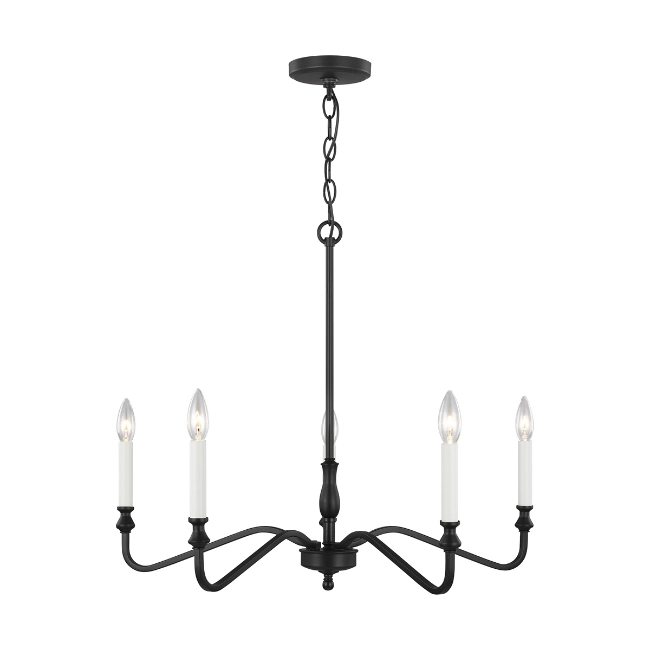
A FEW OF OUR FAVORITE TOB PENDANTS

Until we found a way to purchase those same Thomas O’Brien lights I had been eyeing for a fraction of the price! eBay.

Many designers purchase light fixtures before the room is built and before their clients have seen everything installed together. The easiest way to sell those open box items that were purchased 6+ months before that their clients have since decided they don’t love? eBay.

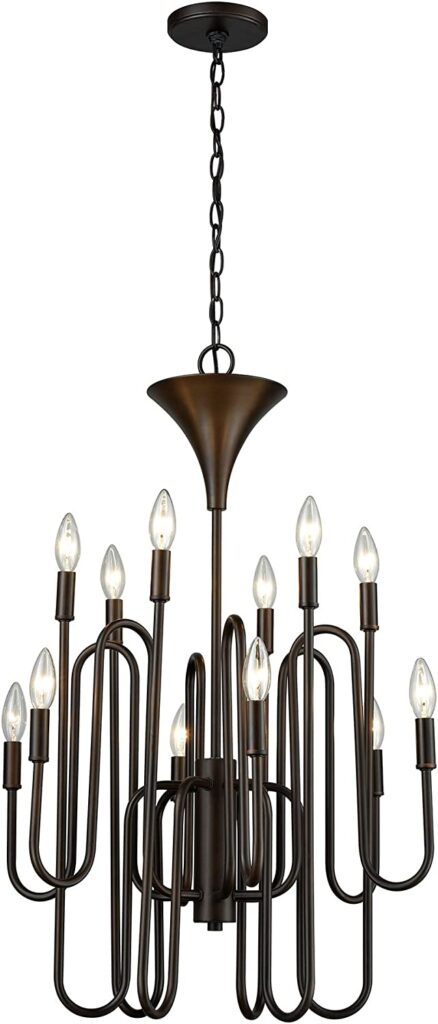
But, even on eBay the Katie fixture with an acorn globe I had my eye on (retail price: $479 each) was $300 plus. Then I found ones without the glass – ones that were broken in transit or storage. Those were about $100 each. Much more reasonable… if you could find the glass.

And I did. One of my favorite lighting companies to buy from (who also has great Open Box specials on eBay) sells replacement glass if you contact customer service. Sometimes its pricey. On these Katie pendants, it was only $42 per globe!

THE QUOTE FOR REPLACEMENT GLASS

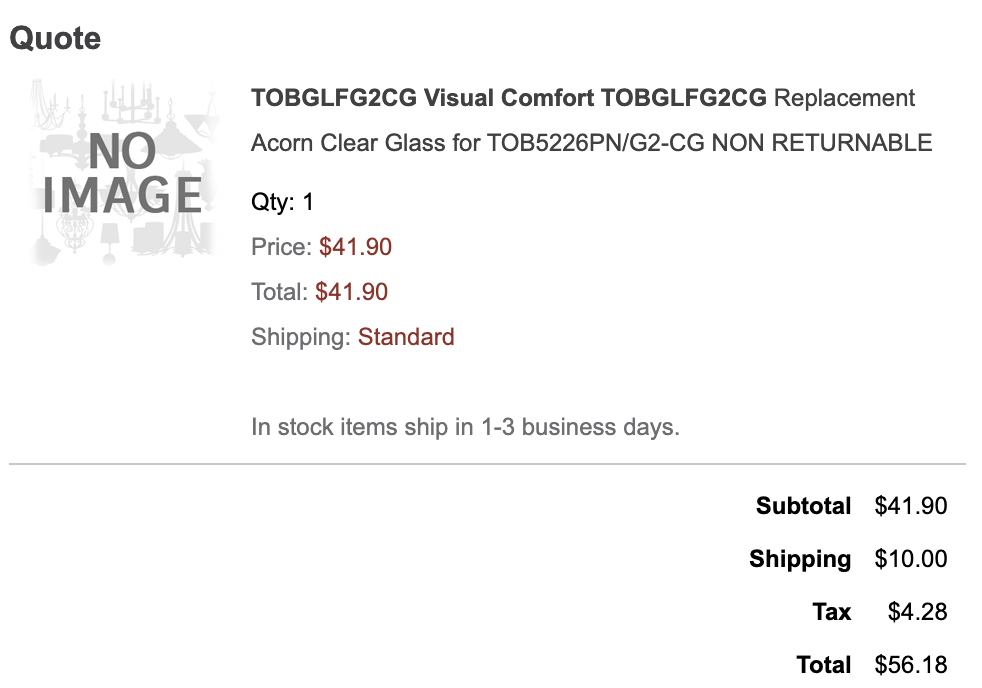
If you’re following along:

  • Retail price is $479 ($958 for two, plus tax)
  • On eBay, the pendants (metal part) are ~$100 (include “no glass” in the search terms)
  • Replacement globes are $40 + $10 in shipping
  • Total price for each of my pendants: $280.

We saved $670 by purchasing the pendant on eBay and the glass separately! And, there is NO WAY we could have found lighting this nice for $140 a pendant, even on Amazon or Wayfair.

Huge win.

Visual Comfort Katie Acorn kitchen island pendants at hundreds off

This isn’t the only light we’ve turned to eBay for. Click to search a few of our favorite finds from around our house below.

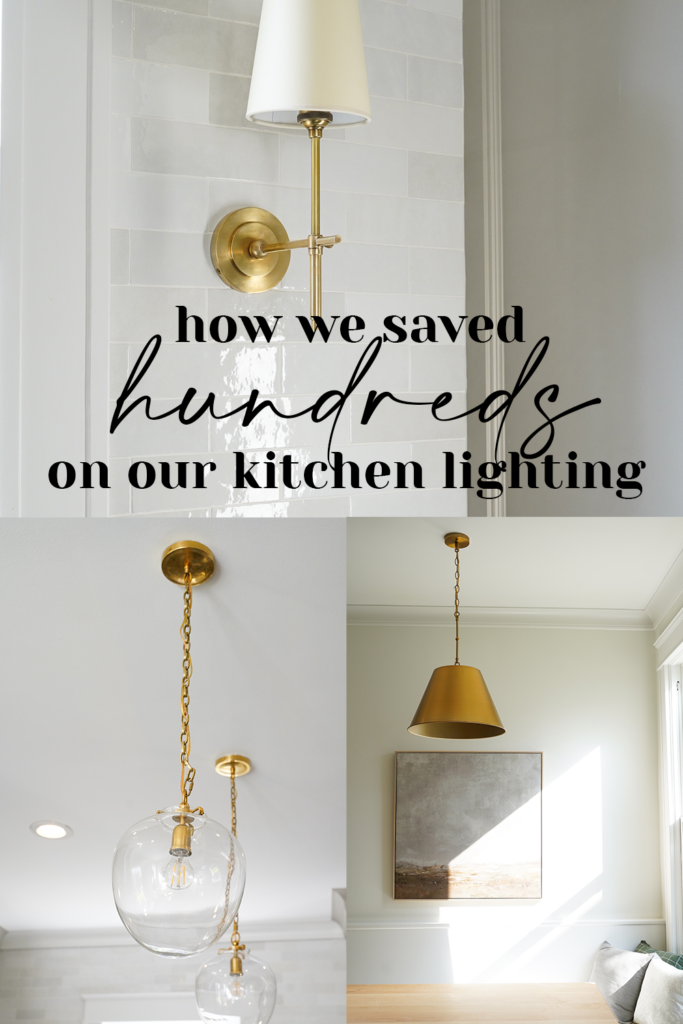
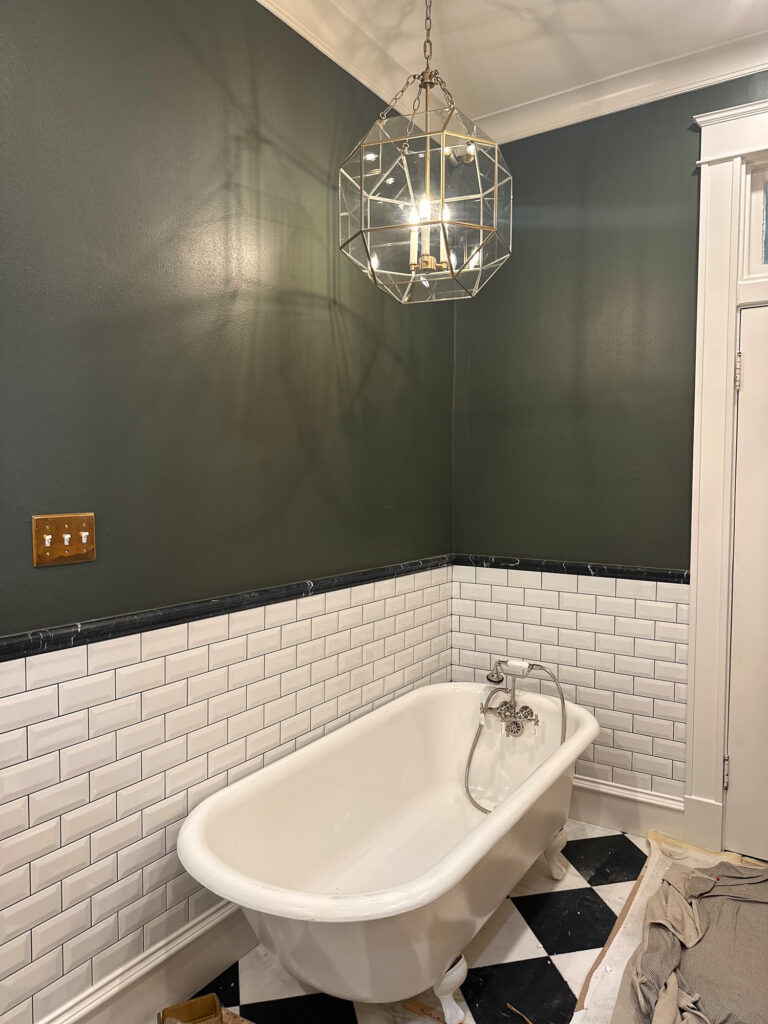
Visual Comfort Morris Medium Lantern in Brass (above our tub in the primary bath)

Visual Comfort Morrison Pendant in Gold in a bathroom

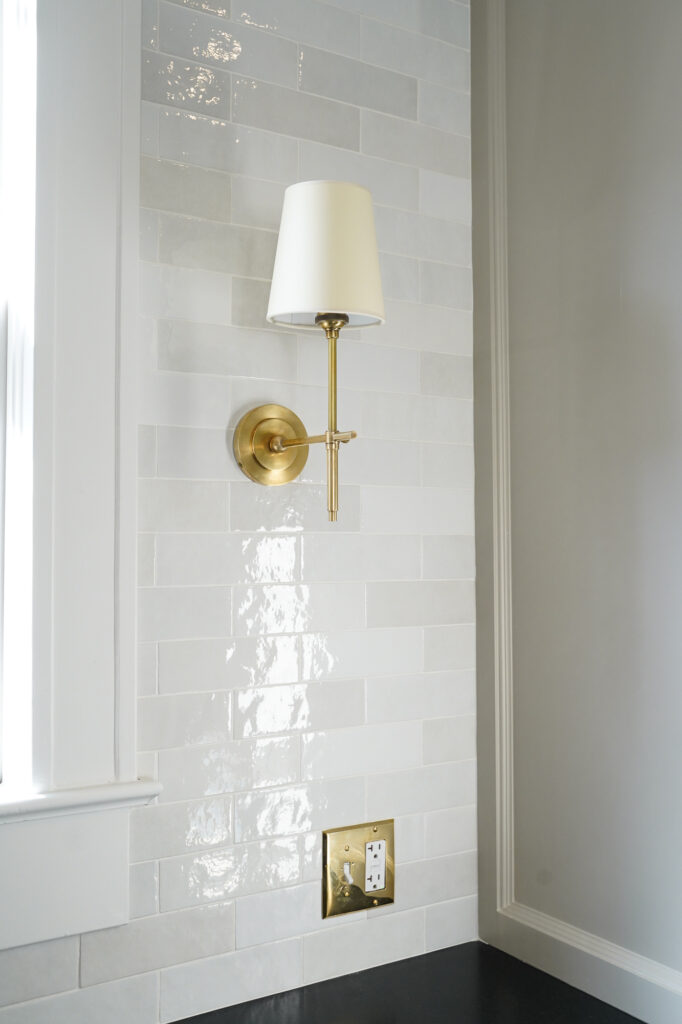
Visual Comfort Bryant Sconce in Brass (on the sink wall in our kitchen)

Visual Comfort Bryant Sconces: How to find a deal

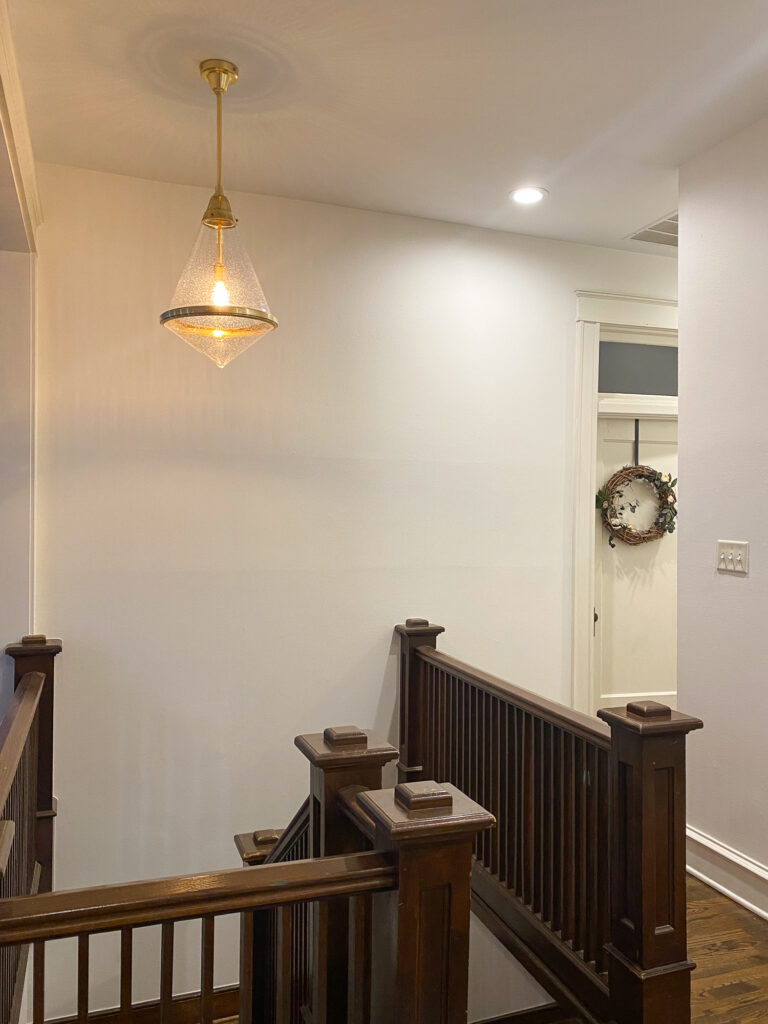
Visual Comfort Gale Pendant in Brass (in our stairwell)

Visual Comfort Gale Pendant in Brass

Shop some of our curated favorites on eBay below.

  • Next Home Design (fixtures for 60% off!)
  • Lighting New York open box deals
  • Search: Sea Gull Lighting, a Visual Comfort brand that has been discontinued
  • Search: Thomas O’Brien, our favorite designers

PIN THIS

  • How we saved $600 off designer lights for our kitchen island
  • How we saved hundreds of dollars on designer lighting from Visual Comfort in our kitchen

Colorful Custom Crayons for Party Favors (+ free printable tag!)

February 22, 2023

For Reese’s first birthday we opted to send little goodie bags to all of the kids in her class on her actual birthday and host a small family-only party at home to celebrate. The question was – what do you send as party favors for a class of 10 one year olds? We brainstormed ideas for weeks and kept coming back to crayons. But not just any crayons – custom crayons in little party favor bags, which we customized for each kid!

Full disclosure: I actually made these custom crayons a year ago and am just now getting around to posting them… as I contemplate making them again for my youngest.

Custom crayon party favors

My husband thought I was a little crazy for suggesting it at first. Wouldn’t it take a ton of time and make a huge mess? No, and no! Not if you know how to make them efficiently.

Follow along for all the tips you need to make custom crayons for your next birthday party or holiday goodie bag!

CHOOSING THE RIGHT CRAYON

While it may be tempting to buy off-brand crayons from the dollar store to make your custom crayons, DON’T! They melt easily but then are super difficult to color with when done! The best crayons are the original Crayola crayons. You can buy a 64 pack from Target for $2.99 (buy online for Drive Up Pickup!) or order two boxes on Amazon for a little more. We used three 64 packs, which made 65 custom crayons of varying sizes.

PICKING YOUR MOLDS

You’ll also need to order silicone candy molds to use to form your crayons. These Alphabet molds were a huge hit (we did the first letter of each kid’s name) – although they do take ~5-6 crayons per letter to make. We mixed them in bags with bugs, flowers, and animals made using these molds for a fun set for each child. Multiple molds = more crayons you can make in one batch.

THE PROCESS

1 // Soak your crayons in water. After 5 – 10 minutes, the paper will just fall off! Set the unwrapped crayon in a colander to dry.

  • Custom Crayon DIY: How to soak the paper off
  • Custom Crayon DIY: How to soak the paper off
  • How to remove paper from crayons for DIY custom crayons

2 // Sort into color families. I love the look of marbled crayons so we sorted by color family (reds, greens, purples, etc.). The extras that were hard to sort were moved to a small pile my three year old used to make “crazy crayons” – crayons made of all the leftovers when we were done.

3 // Chop them up. Lay a paper towel over a plastic cutting board and use a knife to cut the crayons into smaller segments. We cut most crayons into fours, and kept some pieces smaller to fill in any gaps in the molds. Change the paper towel between colors to keep your chopped crayons from mixing. Store cut crayons in a small bowl or ziplock baggy for use.

Easy crafts: DIY custom crayons

4 // Heat your oven to 350. Some instructions may recommend lower heat, however we found Crayola brand crayons were a little tougher to melt and the higher heat helped.

5 // Place your molds on a tray. Not surprisingly, silicone molds full of melted wax are hard to remove from the oven! Laying them on a baking sheet will help with the transfer out of the oven and onto the counter or into the freezer to harden.

6 // Fill the mold cavities. Don’t be afraid to press the crayons into the mold, and have some sticking out the top. As they melt and settle, those grooves will fill in.

  • How to create custom crayons the easy way
  • Easy crafts: DIY custom crayons
  • How to make crayons from silicone molds

7 // Heat the molds and refill if necessary. Put them in the oven for 10 minutes, then start checking every 3-5 minutes until they are fully melted. For some molds, it may be necessary to add more crayons to fill them during the melting process (we had to do this for the letters). Don’t worry about getting melted crayon all the way to the top. It’s better to have crayons that are a little more shallow than ones that spill everywhere.

8 // Remove and let harden. They will harden in 10-15 minutes at room temperature, or faster in the freezer. We opted for the freezer so we could pop them out faster and start on the next batch.

If you’re using them for party favors or goodie bags, once cooled you can seal in plastic baggies. I love these cellophane self-sealing bags for cookies and other party treats. They worked perfectly for our custom crayons too!

Click here to download a FREE printable tag to include with your crayons!

So fun and way easier than you thought, right? We’re making more as soon as our kitchen reno is done – hopefully just in time for our youngest to celebrate his first birthday at school!

PIN THIS

  • How to make custom crayon party favors at home
  • How to melt crayons to create custom crayons

Statement Lights for a Home Office

February 18, 2023

My home office sits tucked away in a room of our primary bedroom – which unfortunately means it’s been a low priority on our renovation list. But, when the light in the old builder-grade ceiling fan circa 1980 finally gave out this week, we decided that rather than swapping the bulb, it was time to swap the whole fixture! The vibe we’re going for in the room is moody, yet historic to fit the rest of the house. And, we want the light fixture to be a statement pice.

Before we get to the good stuff, let’s take a look at the before.

Our house was originally a boarding house, and what is currently our primary bedroom and my office used to be a sitting room and the owner’s bedroom (our bedroom = their sitting room; our office = their bedroom). The renters before us used the office as an extra bedroom.

  • Historic home office:  The before
  • The before photo of our 100 year old office with original fireplace

All that woodwork and the fireplace? Original.

The options

A ceiling fan in a room like this just feels like a travesty. It needs some personality, to make a statement. Also, I just need more light. The room doubles as both my sewing room and my home office, and lots of great light is critical for both.

My wishlist:

  • Makes a statement
  • Matches the historic look of the rest of the house, while still having some modern elements
  • Has multiple bulbs
  • Looks reasonable with a ceiling medallion (which will help it pair with all of the woodwork)
  • Is less than $500

Yes, I know it’s a long list! And, we’ve found a few options that meet all of our needs.

Dense multilight chandelier under $250.

The price point on this dense, 12 light chandelier by ELK was shocking – under $250. I’ve heard great things about the brand, too.

Classic shaded chandelier under $500

I love the modern take on the classic shaded light in this West Elm 4 light chandelier. If I don’t buy it for the office, it’s a major contender for over our breakfast table in the kitchen.

Visual Comfort nine light transitional chandelier for $500

Okay, so this Sea Gull nine light chandelier in midnight black is just a few dollars over budget, but it’s from one of my favorite high-end lighting brands (and a favorite of designers like Studio McGee and Jean Stoffer), Visual Comfort. It’s large with lots of light and looks about ten times more expensive than it actually is! If you want to save even more, the five light version is under $300!

Peggy Guggen Five Light Vintage industrial chandelier

I love the uniqueness of this Peggy Guggen multi-light chandelier – industrial, modern, a little vintage, and comes in several different finishes. It’s also almost 50% off right now, which puts it well within our $500 budget.

Structured six light chandelier by Generation Lighting in matte black - under $250

This is another chandelier by a Visual Comfort brand that I am shocked about the price on. I would have thought at least $1,000, but it’s actually under $250 – and on sale right now for another 25% off!

Classic candelabra chandelier for under $200!

And lastly, a more traditional candelabra-style chandelier from Visual Comfort’s Sea Gull line. I love the fine lines of this and classic style – and it’s under $200!

Now to the hard part – choosing just one. Which one would you pick? Follow along on Instagram to see the final choice!


SHOP OUR FAVORITE HOME OFFICE LIGHTS

Vintage-Look Chandeliers For the Bathroom (Budget-Friendly)

Small bathroom tile grout refresh

Refreshing Old Grout: Before and Afters

Budget Bathroom Renovation: Before

Mood Board for our Budget Bathroom Renovation

Foundation repair in a historic home

Our Old Home Renovation Plan

Life update: We bought a new (very old) house!

How to make mint syrup for big batch mojitos

The Secret to Big Batch Mojitos (without all the work)

The Best Strollers for Disney World (and whether to buy or rent at the park)

Buy or Rent: Strollers at Disney World

DIY Disney Patch Jacket Design Idea for Kids

Designing a Custom Disney Patch Jacket

See More →

Primary Sidebar

Affiliate Disclosure

Most of the product links on my site are affiliate links, which means I get a small commission if you purchase from those links.  Don’t worry – that doesn’t raise the price to you!  I’m always looking for a good deal to share!

Subscribe

affiliate disclosure

Most of the product links on my site are affiliate links, which means I get a small commission if you purchase from those links.  Don’t worry – that doesn’t raise the price to you!

Newsletter

recent topics

Africa Blog Advice Breakfast Build Your Empire Cocktails & Wine Competition Bikini DIY Dessert Direct Sales Advice DIY DIY Competition Bikini Europe Family Fashion + Gear Features Fitness Flight Food Glam on the Go Historic Home Home Look for Less Main Course Pregnancy Restaurant Guides Reviews Small Business Advice Snacks Texas Travel Guides Travel Tips United States Workouts

Search

Copyright © 2026 · Foodie Pro Theme by Shay Bocks · Built on the Genesis Framework · Powered by WordPress

We use cookies to ensure that we give you the best experience on our website. By clicking "Accept", you agree to our use of cookies and other similar technologies.